10 Best Pro Secrets:
How to Paint a Wall Mural Perfectly
You want to transform a blank wall, but aren’t sure where to start. Learn the exact process of professional mural execution directly from a 22+ year master muralist.
How do you correctly paint a wall mural? To know exactly how to paint a wall mural like a professional, you must follow a strict process: start by cleaning and priming the wall, sketch your design using a grid or projector, block in the foundational background colors, add fine art details with specialized brushes, and finally, seal the fully cured painting with a museum-grade clear topcoat.
Learning from a Master Muralist
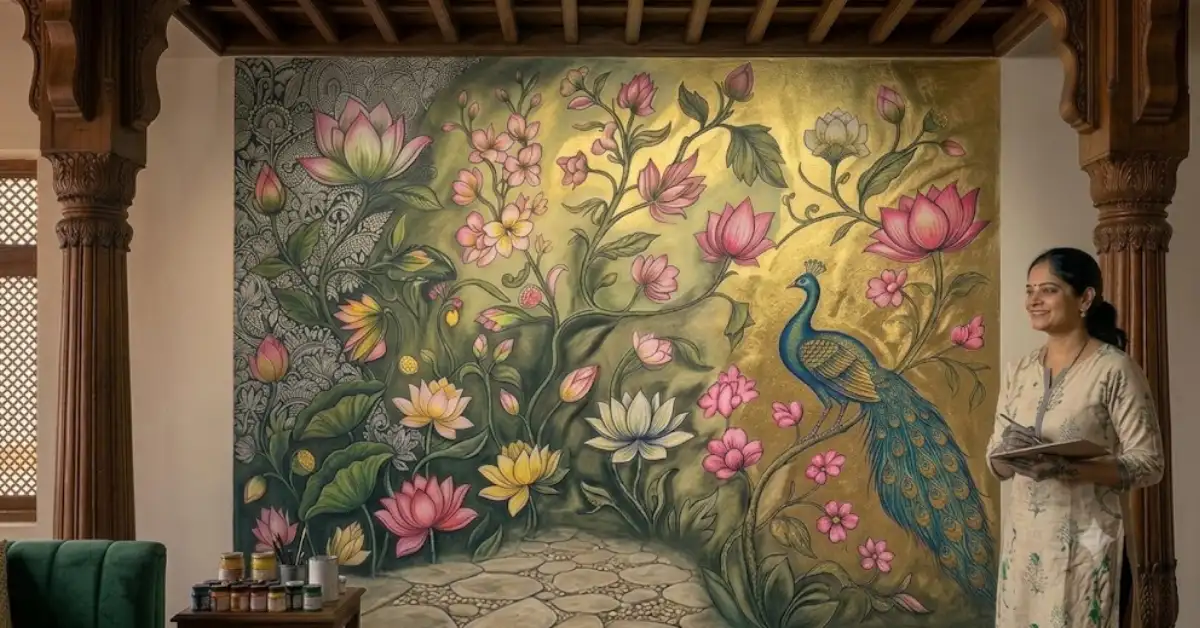
You’ve decided to add a magnificent wall mural to your home or office. Congratulations! Hand-painted murals can add unparalleled life, depth, and personality to any space. But where do you start? Aapki manpasand deewar ko khubsurat banane ke liye ham aapke liye hajir hain!
At Wall Painting Mumbai, I have spent over 22 years mastering the art of pure fine-art murals, avoiding cheap textures and wallpapers. While hiring a professional is the ultimate luxury, I want to share my studio secrets with you. Here are the 10 best professional steps on how to execute a wall mural flawlessly.
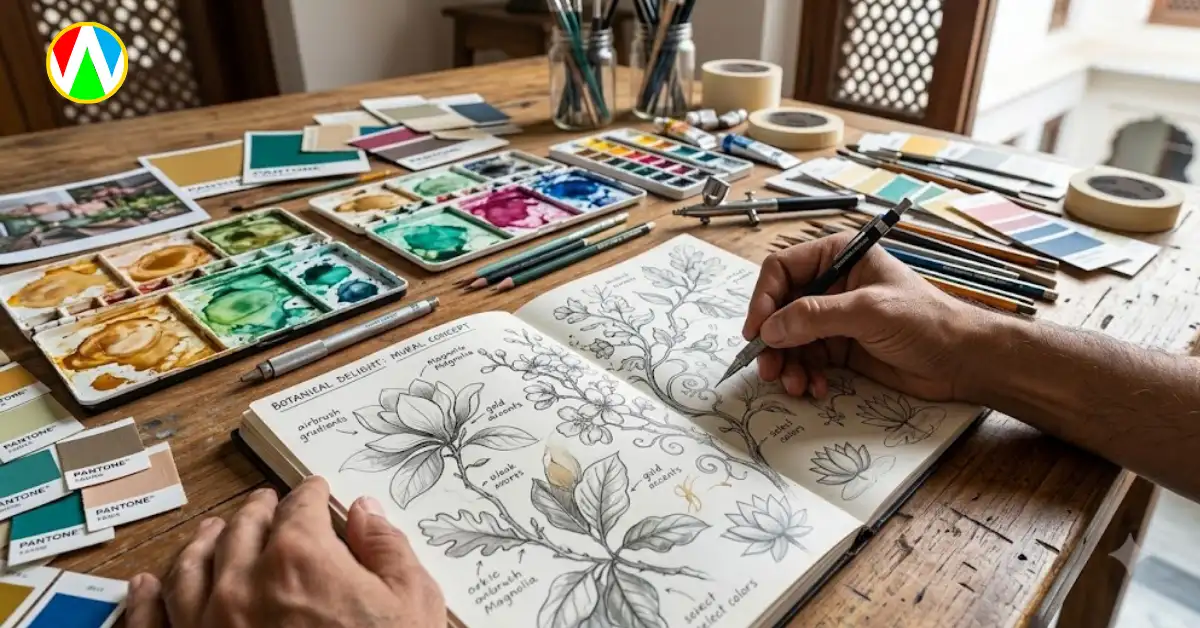
The first step in understanding how to paint a wall mural is finalizing a clear vision. Start by sketching out ideas on paper or creating a digital mockup.
Consider the room’s existing color scheme and lighting. Are you painting a serene botanical landscape or a vibrant pop-art piece? Narrow your ideas down to a final, refined composition before you ever touch a brush.
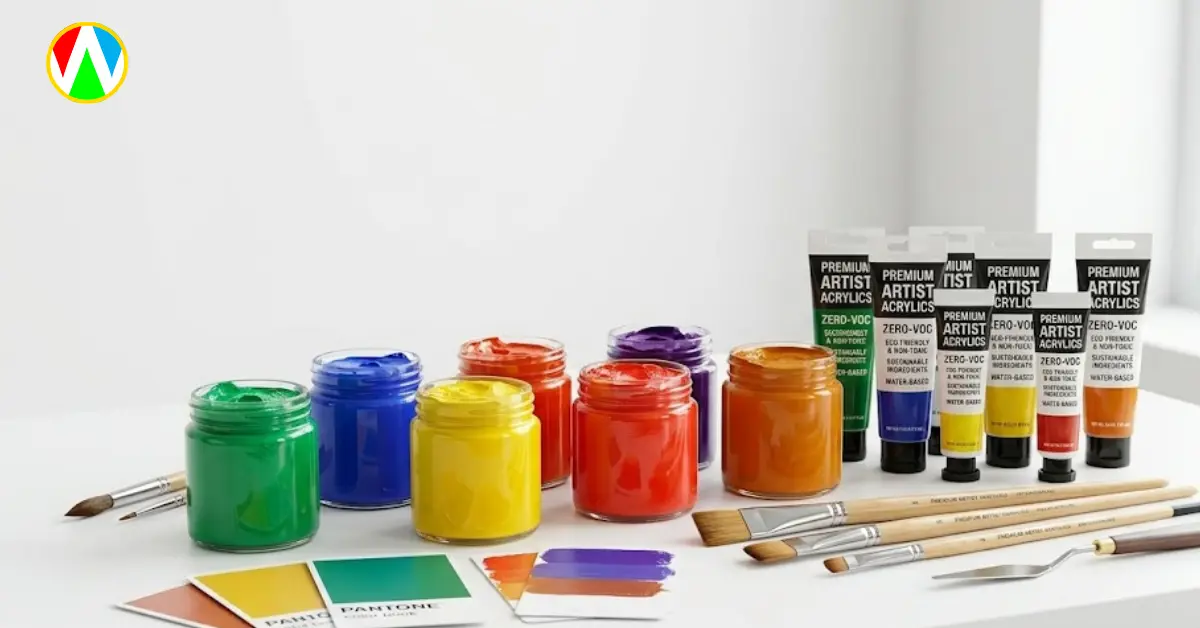
The biggest mistake beginners make is using cheap, highly toxic paints. As a professional, I exclusively use premium, 100% Zero-VOC, and odorless acrylics.
Not only do these high-quality paints provide richer, longer-lasting colors, but they also ensure that the room remains safe and breathable for your family during and immediately after the painting process.
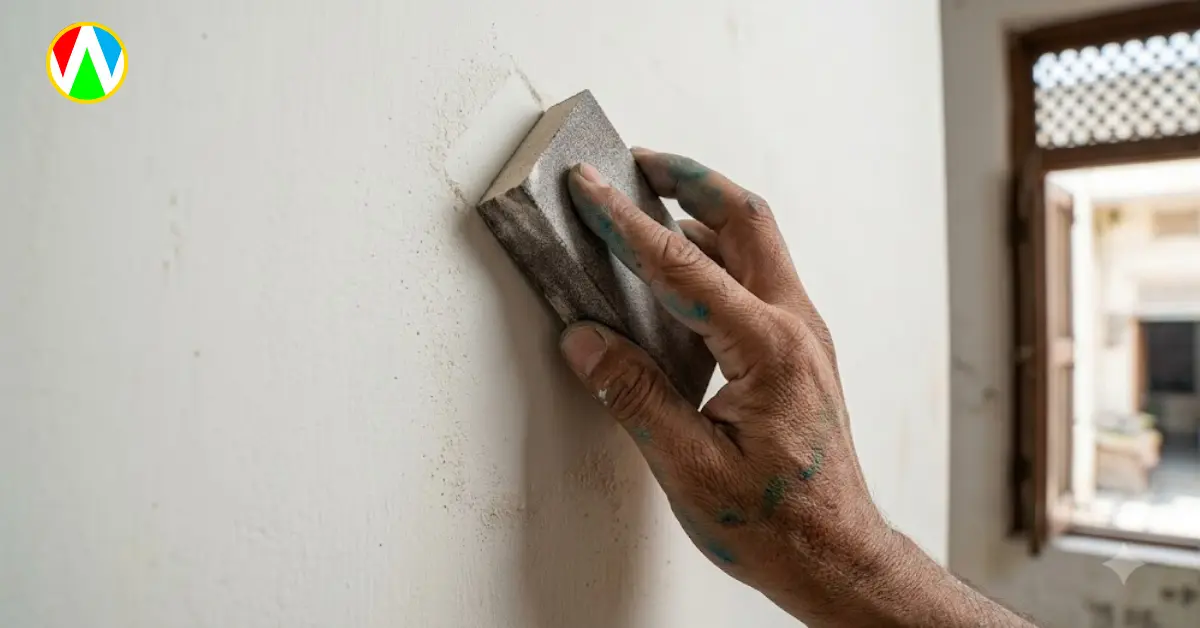
Fine art requires a flawless canvas. Before applying any paint, wipe the wall down with a damp cloth to remove dust, grease, and cobwebs.
If there are any cracks, nail holes, or peeling flakes, patch them up and sand them completely smooth. A clean, flat surface ensures your brushstrokes will be seamless.
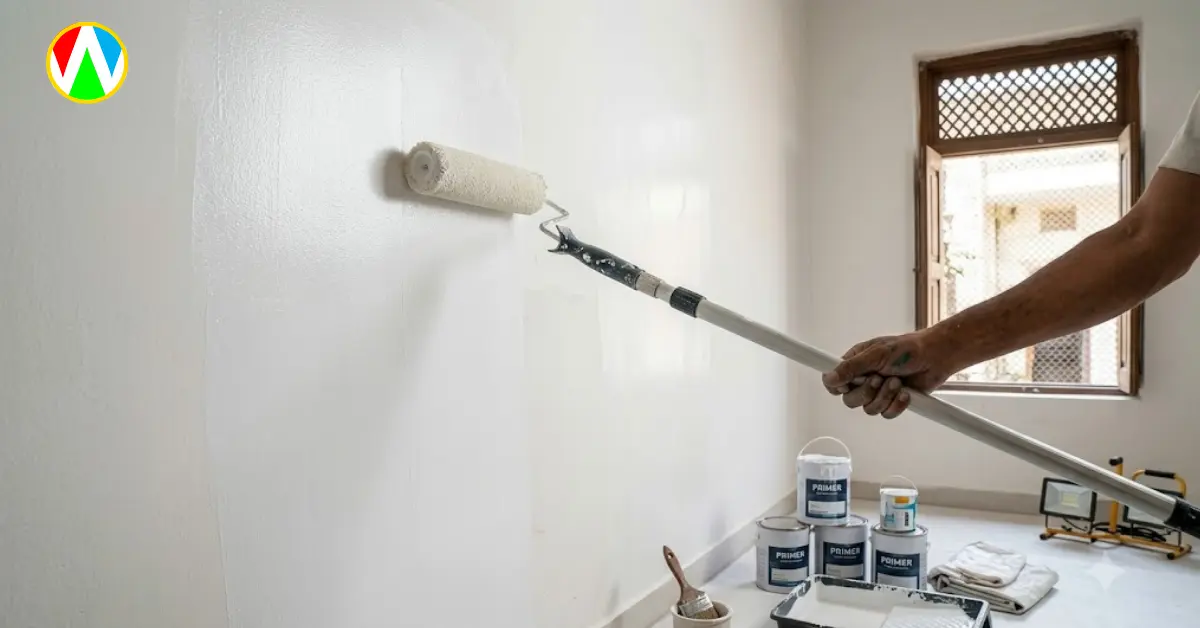
Never skip the primer! Applying a good-quality primer provides a stable, “grippy” surface for your acrylic paints to adhere to.
It also blocks old, dark wall colors from bleeding through your new artwork. Apply the primer in a smooth, even coat and allow it to dry completely (usually 2 to 4 hours) before moving on.
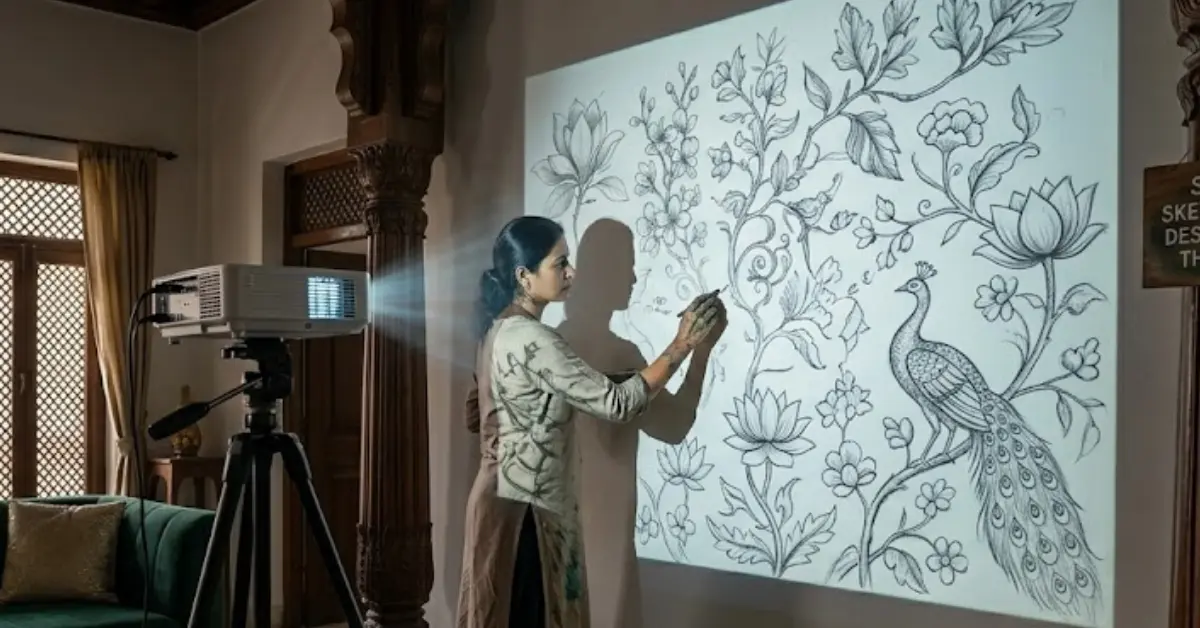
Now it’s time to transfer your design. For beginners, doing this freehand can distort proportions. Professional artists often use the “Grid Method” or a digital projector.
Dim the room lights, project your image onto the wall, and use a light pencil or chalk to trace the main outlines. Focus only on the overall composition at this stage, not the micro-details.
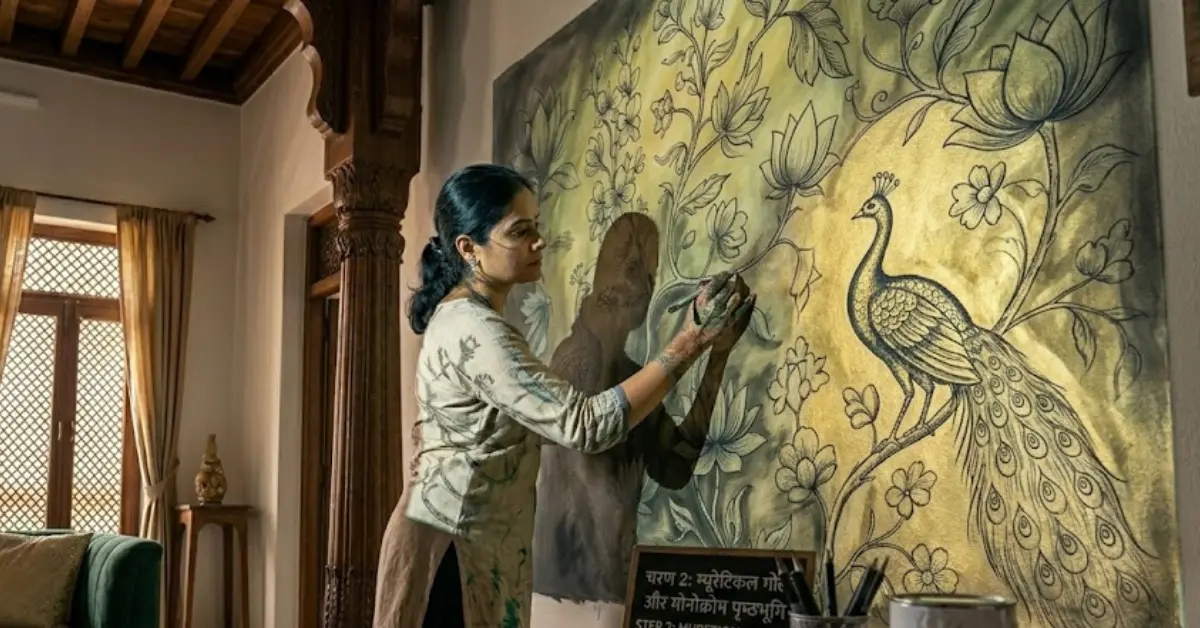
When you finally start painting, work from the “back” to the “front”. Start by blocking in your largest background elements (like skies, base gradients, or distant landscapes).
Use larger, broad brushes or rollers for this step. Establish your foundational colors quickly before getting bogged down in the foreground subject matter.
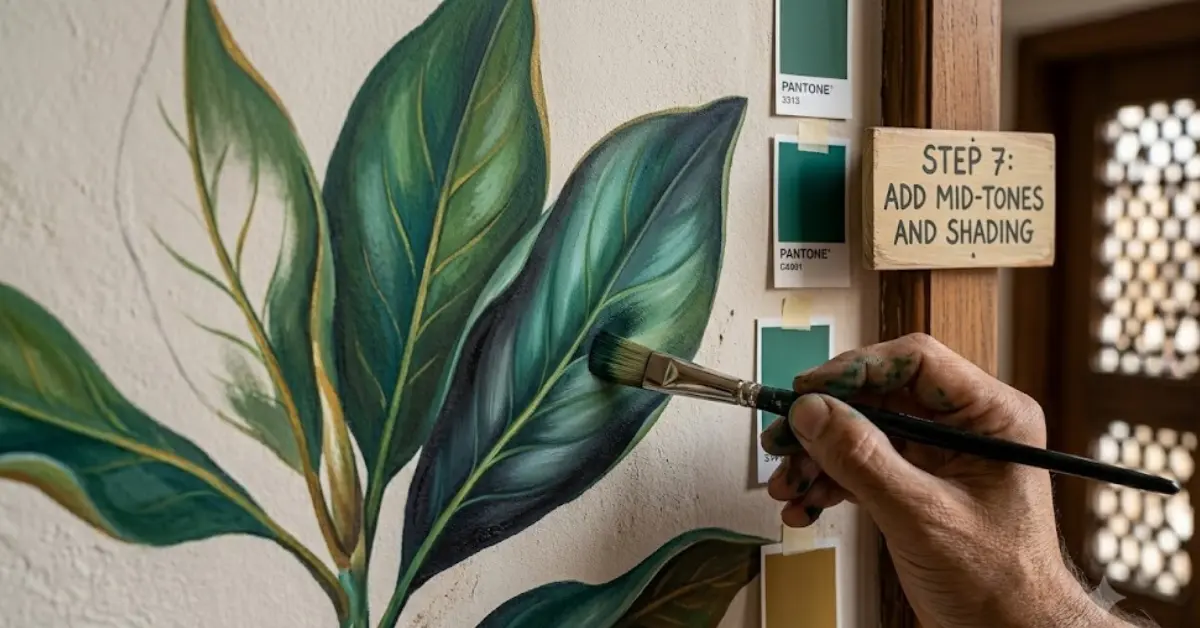
Once the base colors are down, it’s time to build dimension. Switch to medium-sized brushes and start adding your mid-tones, shadows, and highlights.
This is where a flat painting starts to look 3D. Identify your “light source” in the painting and ensure all shadows fall consistently on the opposite side of the objects.
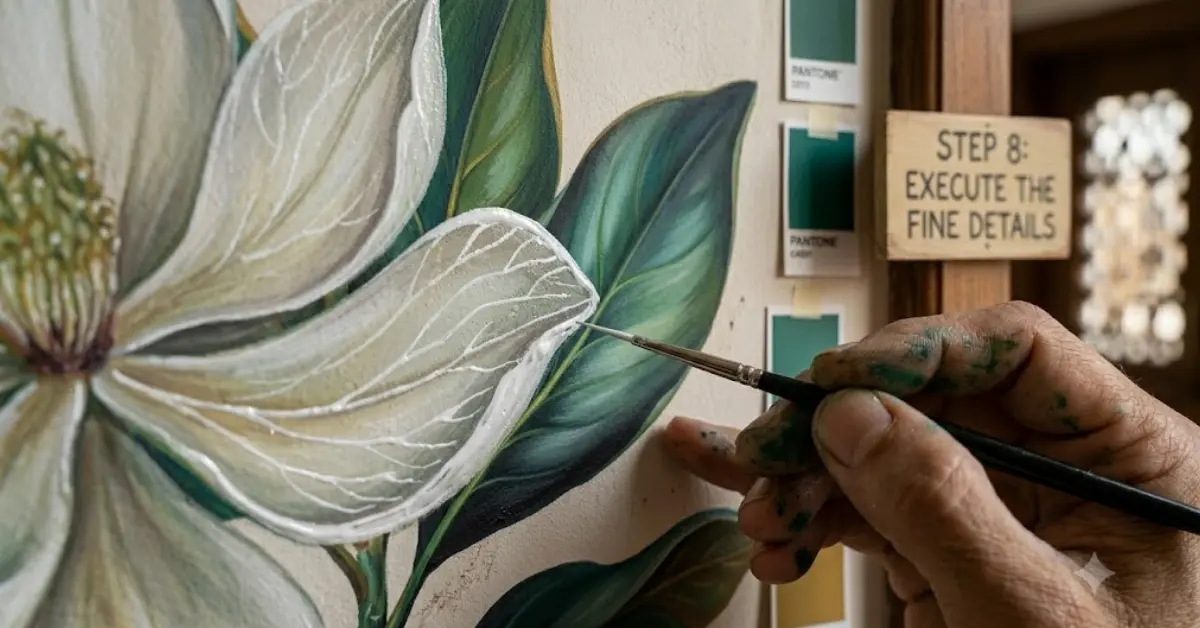
This is the step that separates amateurs from master muralists. Take out your smallest, finest liner brushes.
Add the sharpest highlights, the deepest core shadows, the intricate veins on leaves, or the sparkles in a starry night. Take your time—these crisp details are what pull the entire masterpiece together.

Patience is vital. Once you have placed the final stroke, you must let the mural dry and cure thoroughly.
Depending on the humidity of your city and the thickness of the paint, this can take anywhere from 24 to 48 hours. Do not attempt to seal or wash the wall while the acrylics are still curing, or you risk smearing the art.
To ensure your mural lasts for decades without fading or taking damage from moisture, sealing it is mandatory.
Apply a non-yellowing, clear, museum-grade topcoat (matte or satin finish). This final layer makes the artwork 100% washable and protects it from dust and UV rays. Step back, and enjoy your breathtaking new space!
Explore More Wall Art Ideas
Want a Flawless Masterpiece? Hire a Master.
Painting a luxury mural requires decades of experience. Skip the DIY stress and let Artist G.S. Arora execute a museum-grade, 100% seamless fine art mural for your home PAN-INDIA. No site visit needed—just WhatsApp your wall photos!
Frequently Asked Questions
